
This site is hosted on Google Cloud using a Cloud Storage bucket to serve static HTML files generated using Hugo. I like this setup because it is fast, simple, and the content is easy to move to another platform or hosting provider if I want to.
If that kind of setup appeals to you, this post can serve as a quick reference to get your own site up and running quickly. I’m going to assume that you have already:
- Installed Hugo on your local computer
- Installed the
gcloudCLI on your local computer, and logged in to your Google account
Google Cloud already has excellent documentation on hosting a static website that I strongly recommend. I’ll cover some key steps here, but check out the documentation for more advanced use cases and options.
Setting up a Cloud Storage bucket
You can set up your storage bucket at any time, but if you want to serve your site securely on a custom domain using https, you’ll need to set up the SSL certificates on Google Cloud. That process can take some time to propagate (in my case it took about 40 minutes) so I recommend starting here first.
These steps are just the basics. For more options and details, check the documentation.
- Configure gcloud to use your cloud project:
gcloud config set project my-project
replace my-project with your own
- Enable the services you’ll use for this solution
gcloud services enable compute.googleapis.com storage-component.googleapis.com cloudbuild.googleapis.com
- Create a storage bucket to hold the static website files:
gcloud storage buckets create gs://my-blog-files --location=us-central1
replace my-blog-files with a name for your storage bucket
replace us-central1 with a different zone if you prefer
- Make the storage bucket public for reading:
gcloud storage buckets add-iam-policy-binding gs://my-blog-files --member=allUsers --role=roles/storage.objectViewer
replace my-blog-files with the name for your storage bucket
Set up your load balancer and SSL certificate
Next, set up your load balancer and SSL certificate for your domain. I’ve found this easiest to do in the console.
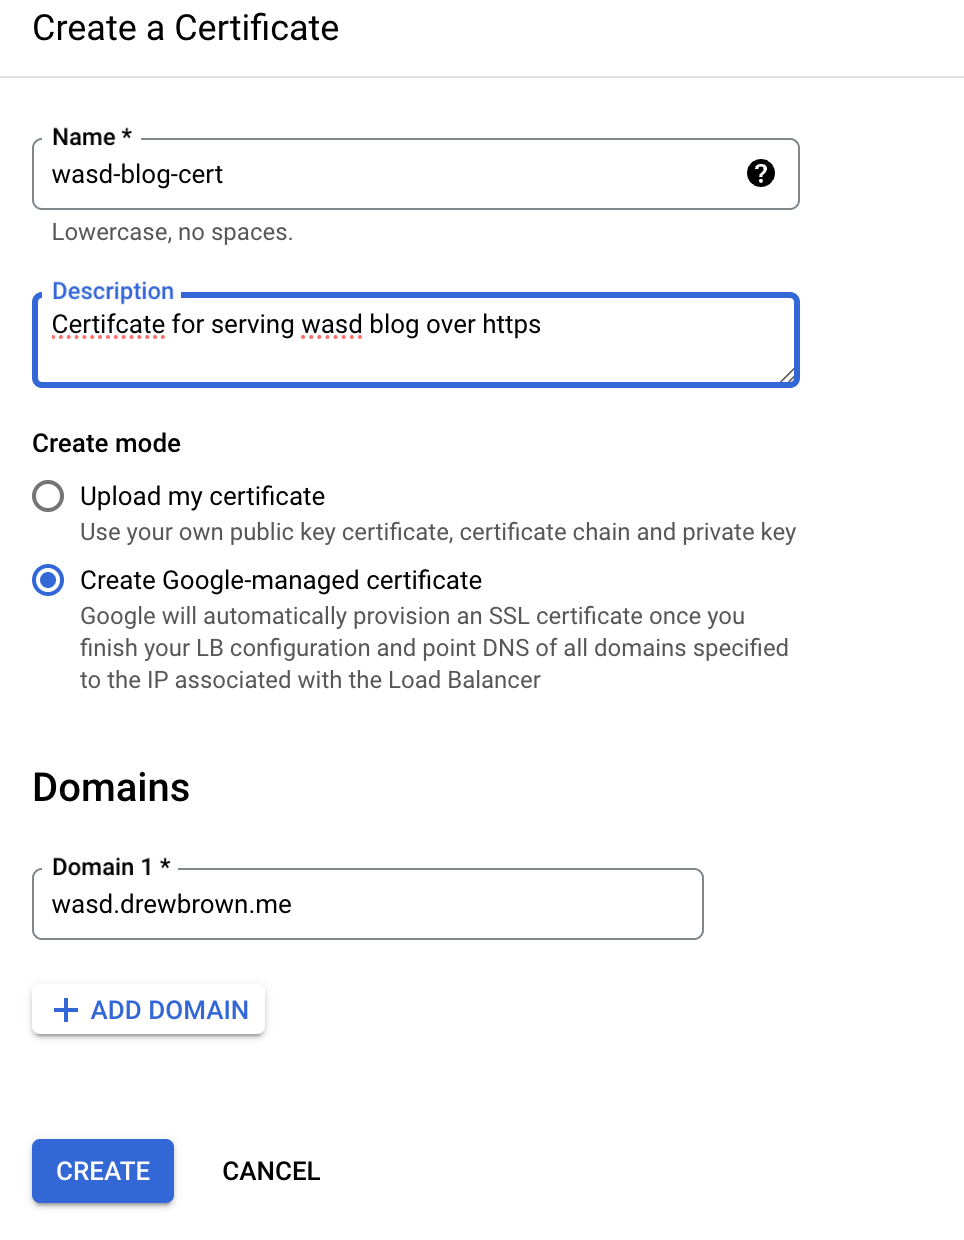
Creating a new certificate for the site
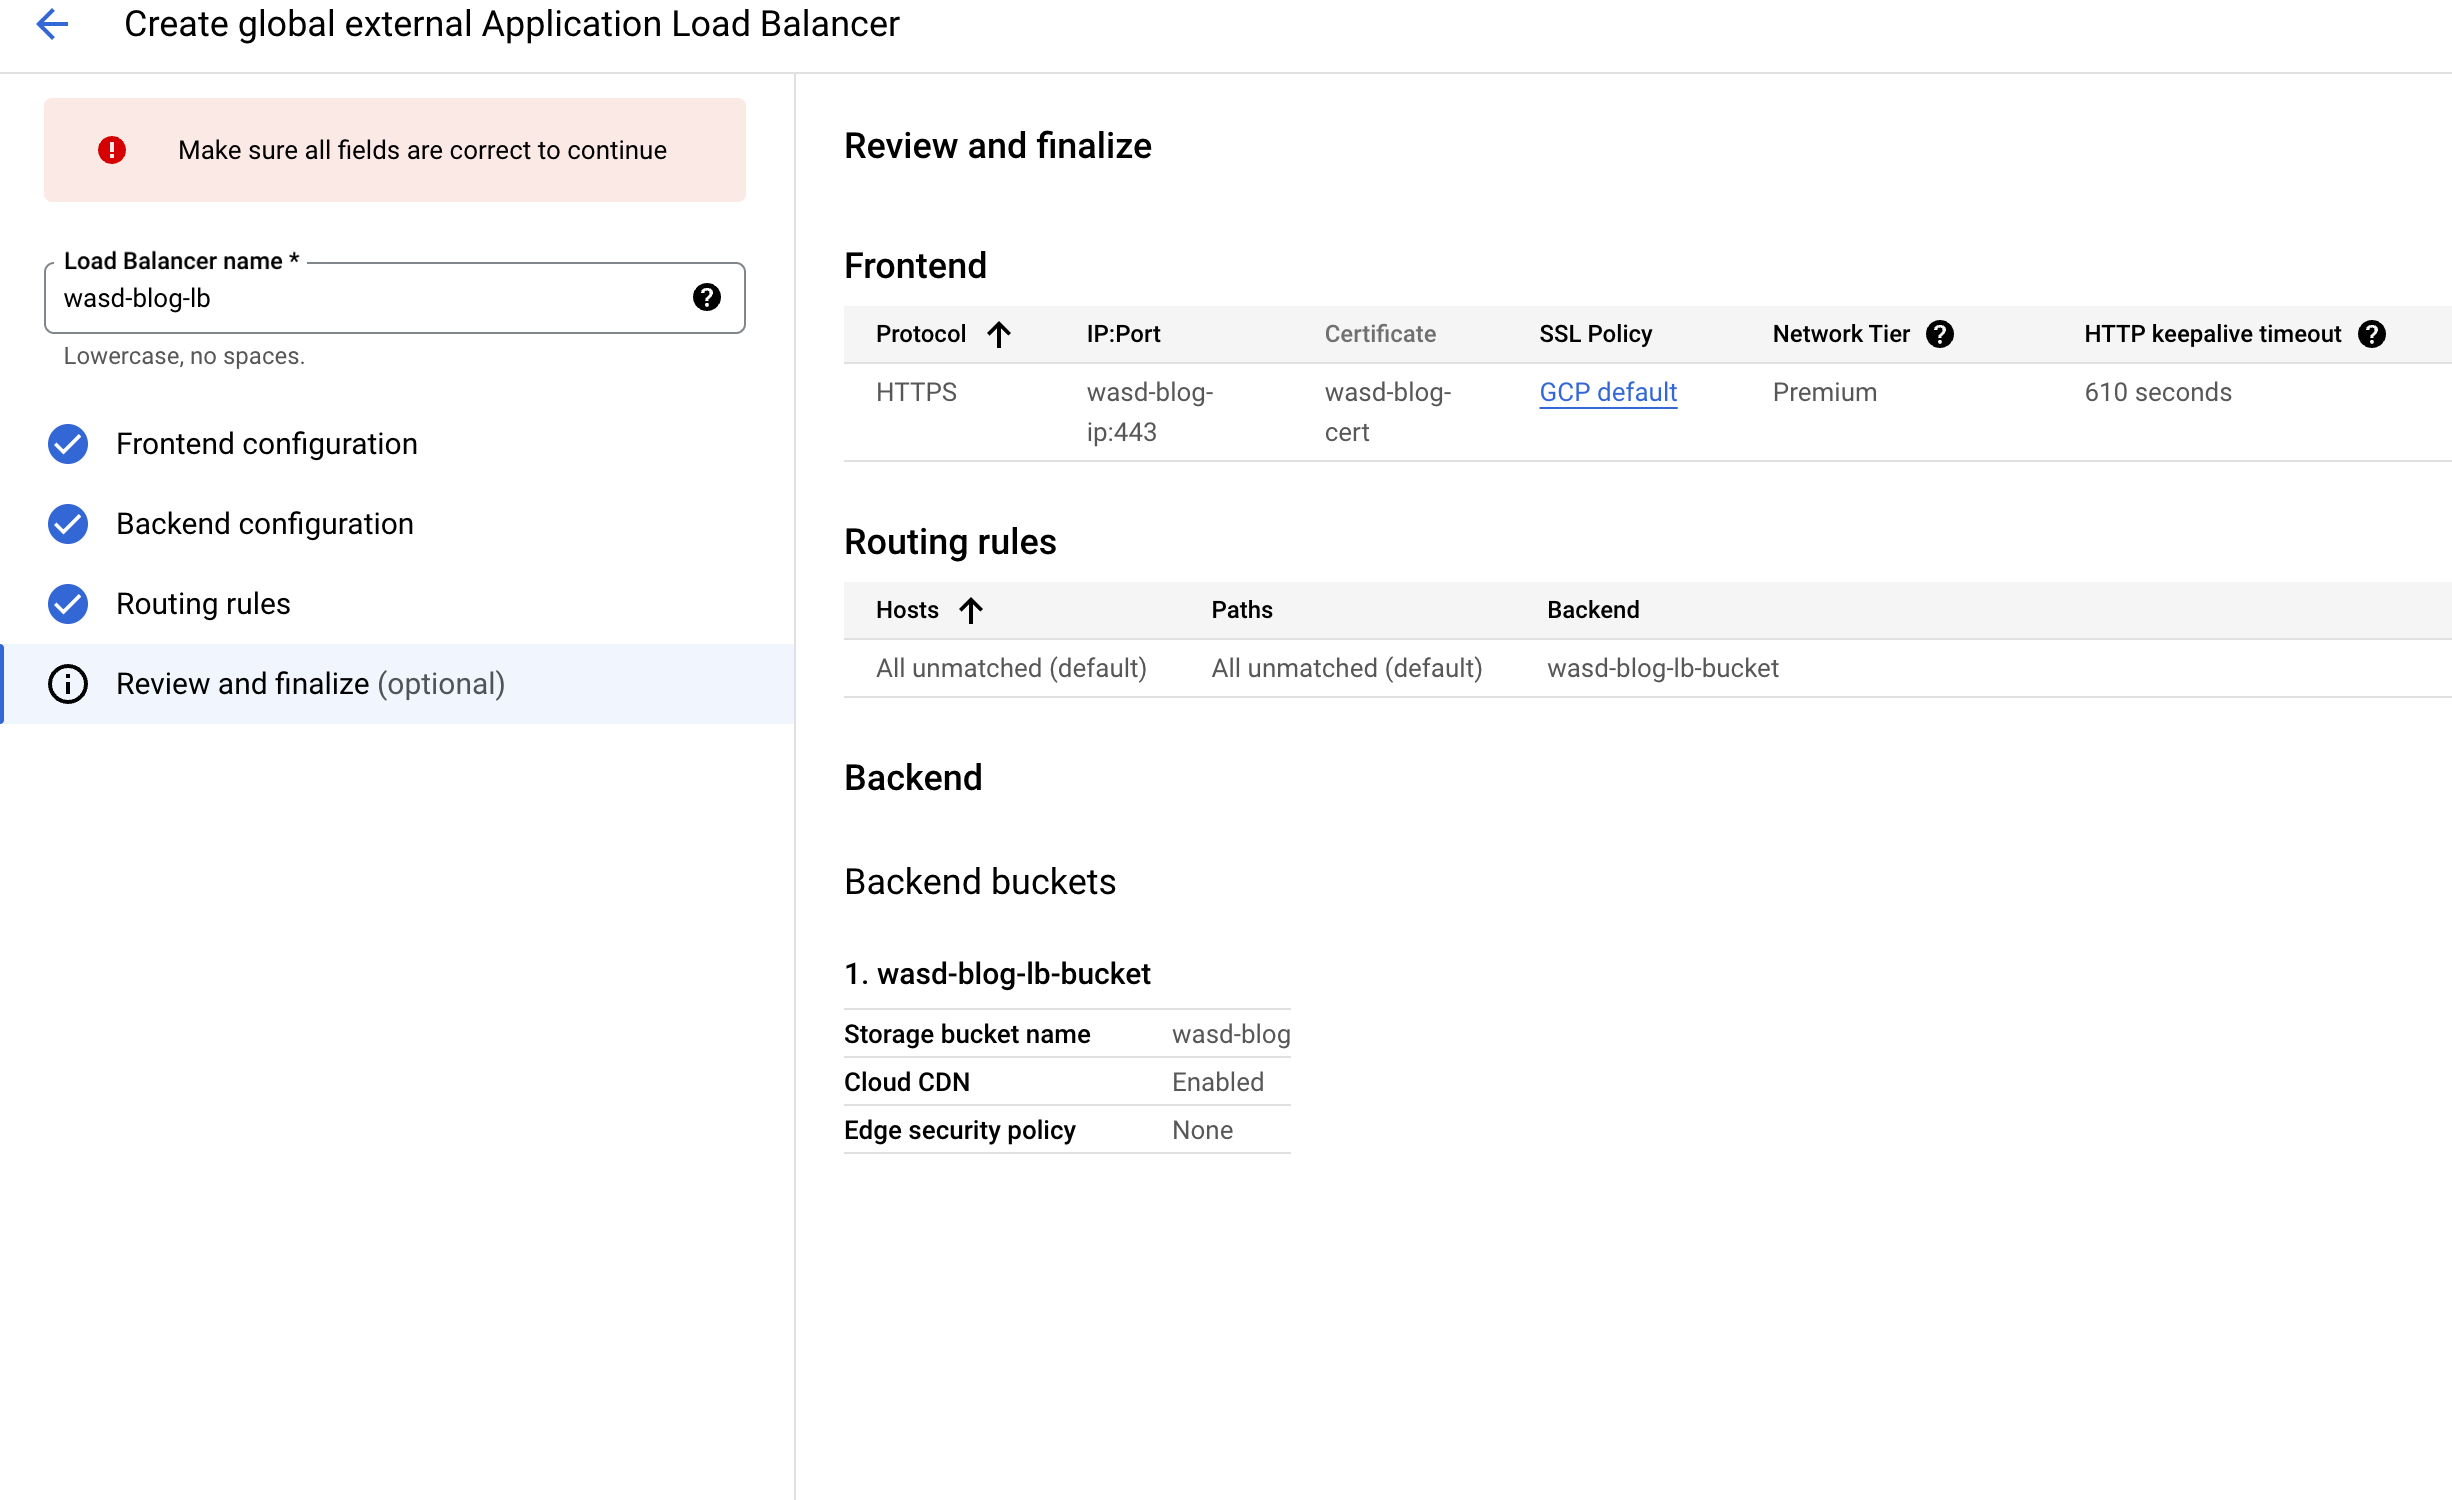
Setting up a load balancer with SSL
Setting up your Hugo site
Now the fun part. I’ll keep this hugo site very simple.
- Make a new hugo site:
hugo new site wasd
replace wasd with the name of your site, and cd into that directory when you’ve run the command.
- Initialize a new hugo module. This makes it much easier to integrate themes and keep them up to date:
hugo mod init github.com/arbrown/wasd
- Add a theme to the modules section of
hugo.toml:
[module]
  [[module.imports]]
    path = "github.com/vaga/hugo-theme-m10c"
I’m using m10c for this site, but feel free to check out other options
- Update your hugo module with the recently added theme:
hugo mod get -u
- Run hugo’s built-in server to see your new website!
hugo server
Deploying to Google Cloud Storage
Now leverage hugo’s built-in deployment feature to push your site’s files to your cloud storage bucket. hugo deploy uses the Google Cloud Storage API to check which files have changed (or been added or deleted) since the last time you uploaded them, and then does all the work to update your site with any new content you’ve added.
Add the following section to hugo.toml:
[deployment]
  [[deployment.targets]]
    name = "storage_bucket"
    URL = "gs://wasd-blog"
replace gs://wasd-blog with the URL to your storage bucket that you created at the beginning.
Finally, run the following command to deploy your site:
hugo deploy --target=storage_bucket
Hugo will automatically update your site with the new content!
Summary
That’s all there is to it! Now you can host a statically generated hugo site on Google Cloud Storage (with your own domain!)
If you’re looking for something else to do next, you might consider automating deployments based on pushing to a git repository.