I’ve been a big fan of Gemini CLI since I was first lucky enough to test an early version internally it before it launched publicly. It’s become an integral part of my workflow, and MCP servers only expand the world of possibilities for what it can do.
Maybe you’ve written your own MCP server. Great! (If not, then I know a great tutorial you can follow… 😏)
But not every MCP server can (or should) be available to the public. Luckily, gemini-cli has built in support for OAuth 2.0. This is straightforward if the oauth is already set up, but what if you want to add it to your own server?
This post will walk you through the process of setting up OAuth for a custom MCP server to use with the Gemini CLI. By using OAuth, you can ensure that only authorized users are able to access your custom tools.
MCP Server
For this guide, I’m going to assume you already have an MCP server written that uses the FastMCP library. If you don’t, you can follow this Google codelab to write your own example MCP server. It’s a quick process, and you’ll be up and running in 30-60 minutes.
Creating OAuth Credentials
Once you’ve got an MCP server, you’ll need to create authorization credentials for your MCP server in Google Cloud. This will allow users to authenticate using any Google account and allow the server owner to restrict access. For this, follow these instructions for setting up a new OAuth Web App.
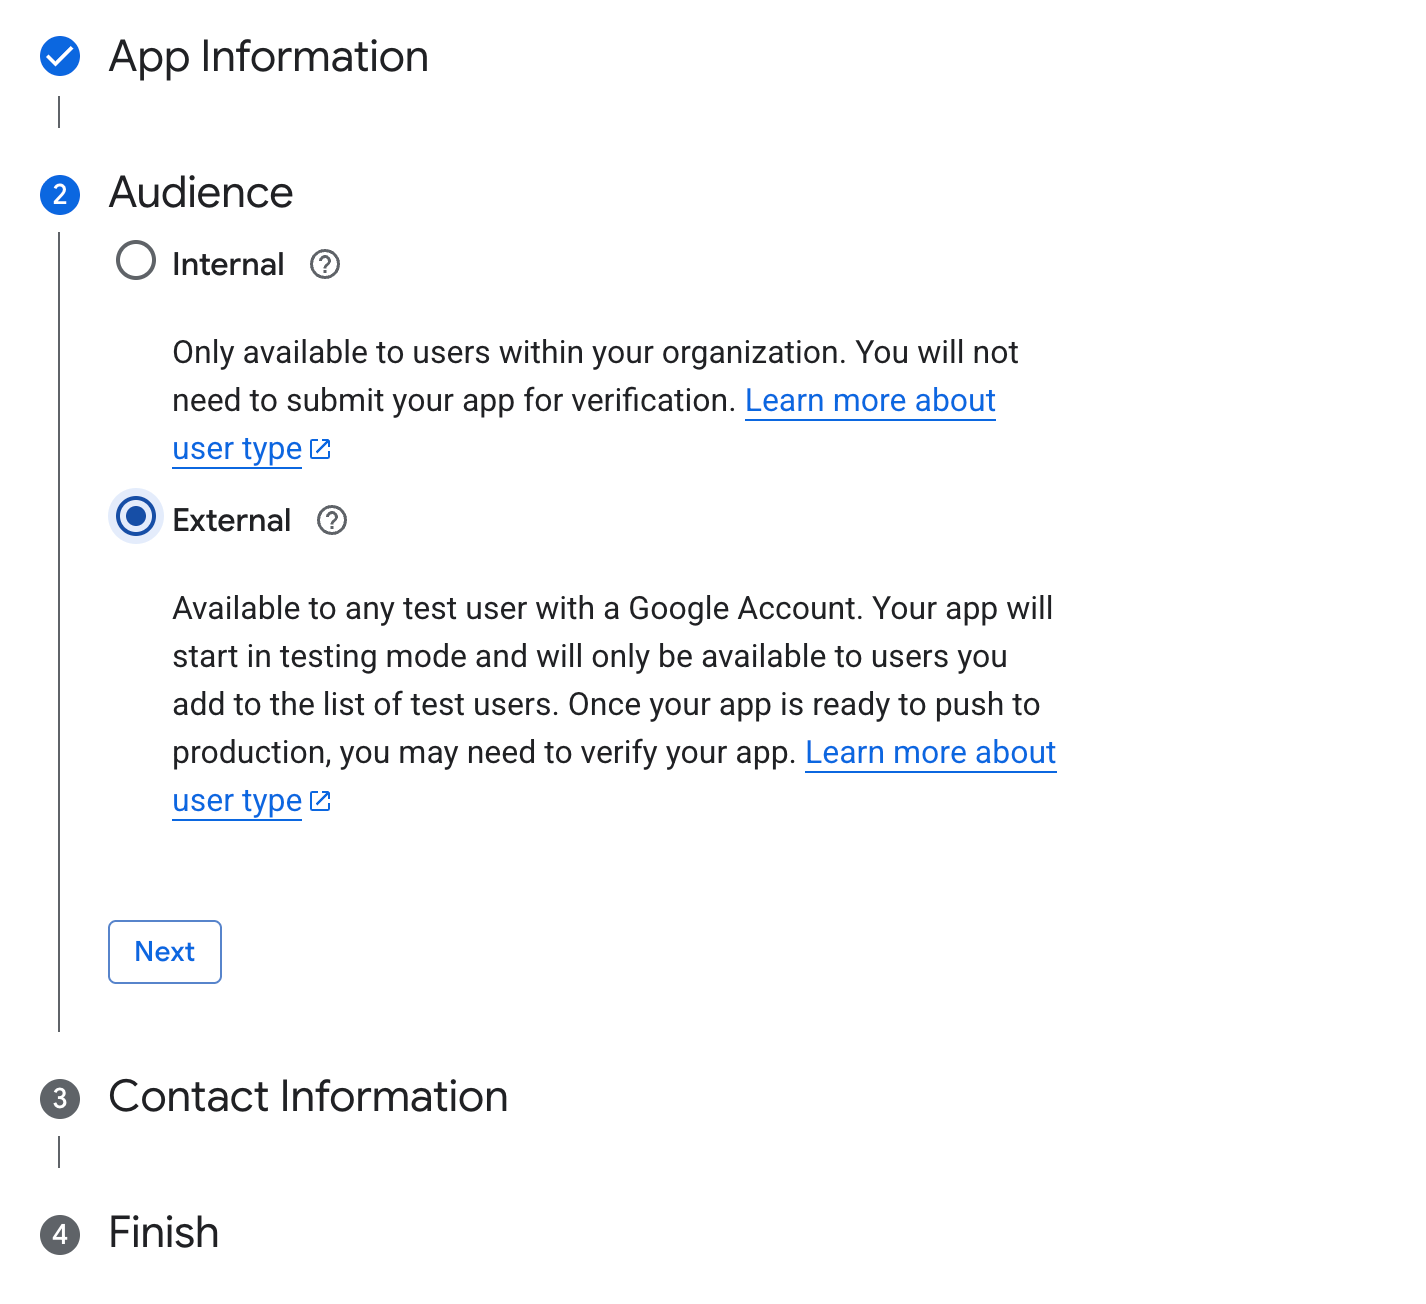
Creating an external oauth client
You can choose to allow anyone with a Google account to authenticate, or limit it to just your organization. You can alos configure a list of email addresses to use while you are still “testing” your application, and this may be sufficient for your needs.
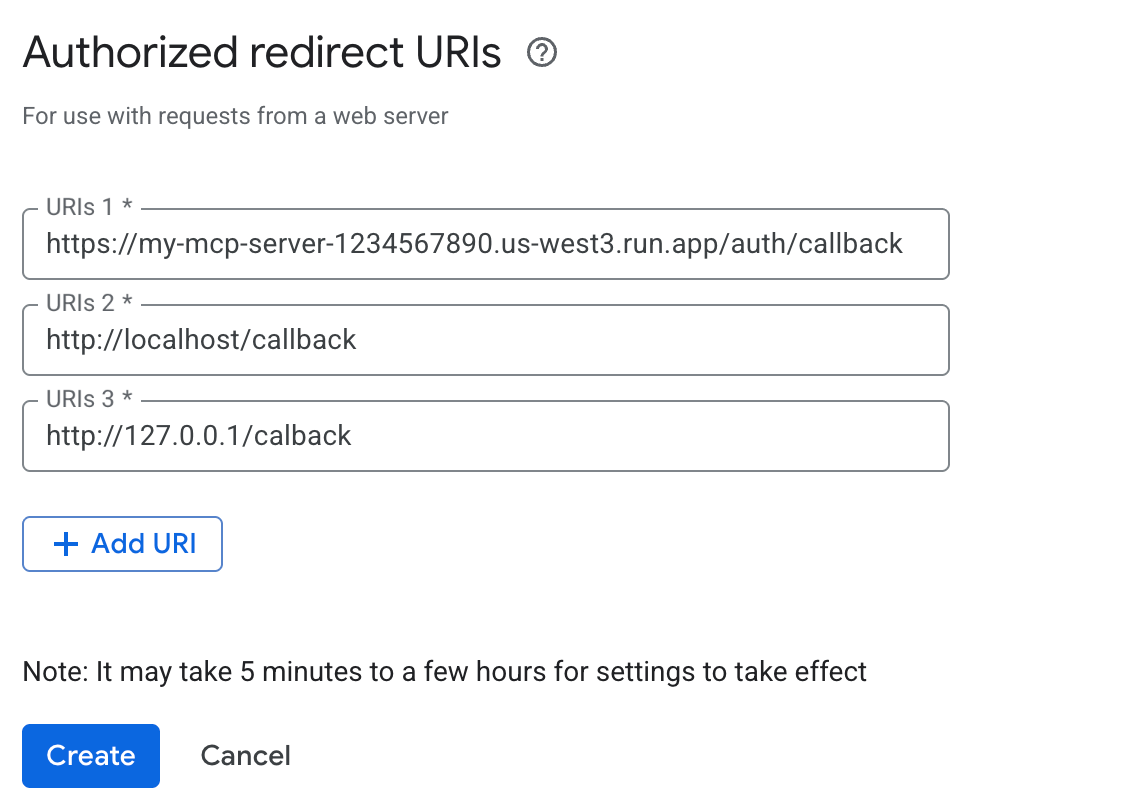
When you create your credentials, you’ll need to specify authorized redirect URIs. This enables the OAuth flow to work on each user’s computers. Two are necessary for the authentication flow to work correctly:
- User Login URI: The
gemini-cliinitiates the login process, and after you authenticate, Google sends a one-time authorization code back to a local address the CLI is listening on. You must add a URI likehttp://localhost/callbackto your authorized list (the port may vary each time, but you can omit it here). - Server Verification URI: The
gemini-clisends the received code to your MCP server. Your server then communicates with Google’s backend to verify this code and exchange it for an access token. For this step, Google needs to trust your server’s callback URL. You must also add your server’s public callback URI, for examplehttps://my-mcp-server-1234567890.us-west3.run.app/auth/callback, to the authorized list. - Optional Localhost IP URI: While not strictly required by
gemini-cli(which useslocalhost), some applications use the IP address127.0.0.1for the local callback. To ensure broader compatibility, you might consider addinghttp://127.0.0.1/callbackto your authorized list.
Make sure your redirects match the server URL EXACTLY
Important: After saving your redirect URI settings, you must wait at least 5 minutes (and sometimes longer) for the changes to propagate through Google’s systems. If you think you’ve set it up right and it’s not working, just grab a coffee and check back later..
Adding Google OAuth to your MCP Server
Now that you have your credentials, you can add Google-based OAuth to your MCP server. FastMCP has built-in support for this, and you can check out their documentation. For our basic example, the integration is just a few lines of code.
import os
from fastmcp import FastMCP
from fastmcp.server.auth.providers.google import GoogleProvider

auth_provider = GoogleProvider(
    client_id=os.environ["GOOGLE_CLIENT_ID"],
    client_secret=os.environ["GOOGLE_CLIENT_SECRET"],
    base_url="https://my-mcp-server-1234567890.us-west3.run.app",  # Must match your OAuth configuration
    required_scopes=[
        "openid",
        "https://www.googleapis.com/auth/userinfo.email",
    ],
)

mcp = FastMCP("My MCP Server", auth=auth_provider)
You can then set the GOOGLE_CLIENT_ID and GOOGLE_CLIENT_SECRET environment variables to match the values from when you set up your client before.
Adding to Gemini CLI:
Next, to add this MCP server to Gemini CLI, you need to edit ~/.gemini/settings.json and add your MCP server to a top-level setting:
  "mcpServers": {
    "my-mcp": {
      "httpUrl": "https://my-mcp-server-1234567890.us-west3.run.app/mcp",
      "oauth": {
        "enabled": true
      }
    }
  }
It’s important here that you match the URI that FastMCP exposes on your server. In this case, /mcp (no trailing slash) is important, and even if /mcp/ would redirect before, it might cause auth issues with OAuth.
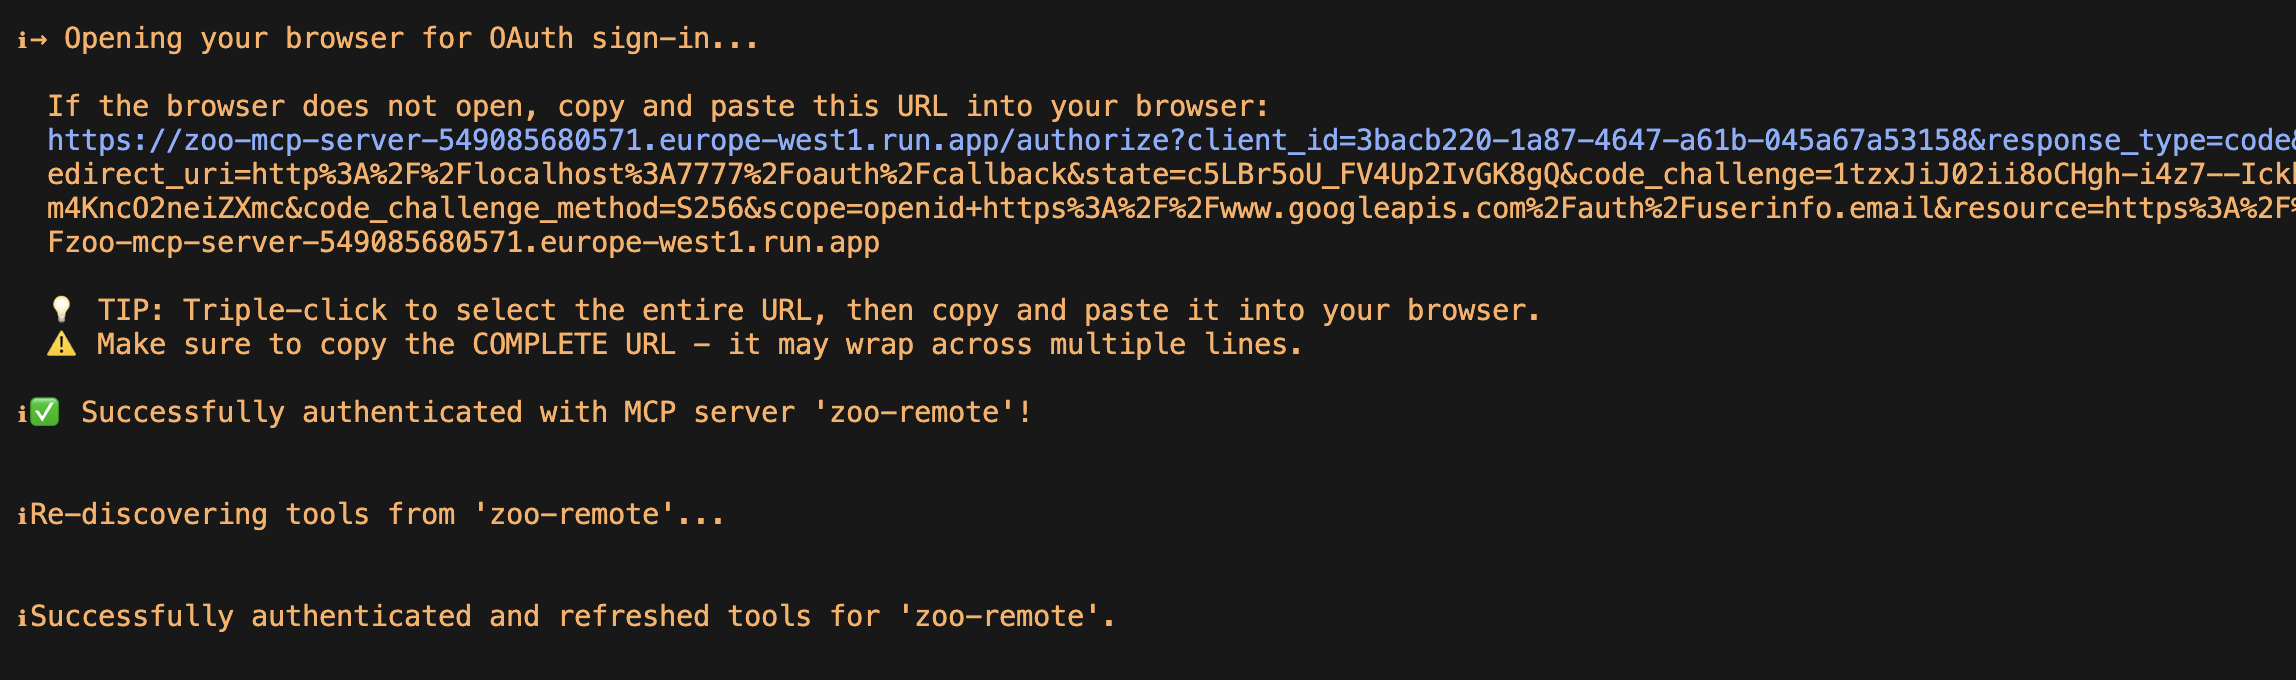
Finally, it’s time to start up Gemini CLI and log in:
gemini
In Gemini CLI, authenticate with your server with /mcp auth my-mcp. This will start the authentication flow in your browser. If it doesn’t open up a browser, you can copy/paste the URL it gives you and navigate there yourself.